In part 1, we explored the concept of what exactly are “good mechanics” according to some clinical experts. Check it out here. Their goal was to help create some standard guidelines and a common language that clinicians, the health care professionals that take care of our pitchers, can follow in hopes of reducing the number of injuries. Check out part 1 here.
One of the key takeaways, that we will focus on today, is the importance of what a pitcher looks like when the front foot contacts the ground. Here’s the checklist that I’ve created based on their recommendations:
- Elbow Flexion: 90°
- Shoulder Abduction: 90°
- Horizontal Abduction: 20°
- Shoulder External Rotation: 45°
- Lead Foot: Slightly closed position
- Stride Length: 85% of the pitcher’s height
- Upper Torso: In line, facing first or third base
- Pelvis Rotation: Slightly open (about 30°) toward home plate
Let’s look at what these measurements look like and why they matter.
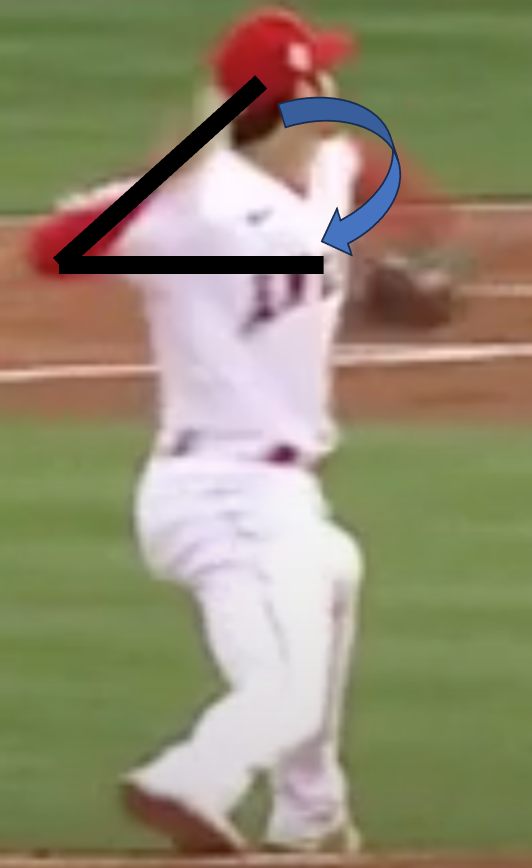
Elbow flexion – 90 degrees
Being at 90 degrees of elbow flexion, plus or minus 10, is important because it allows the forearm to be in the best position to help produce and then receive power.
This angle puts the forearm, along with the hand and ball, in the optional position to produce higher levels of shoulder external rotation (aka layback). Ninety degrees angles are the best at producing torque and that’s what we are trying to do when we load into external rotation. This torque helps maximimize our stretch shortening cycle. Below, we see Jerry Don’s arm as it is about to unloaded after being loaded.

Once that energy starts moving back the other way into internal rotation, this 90-degree angle again is key. Having your elbow too bent or too straight takes away from the natural “whipping” action that occurs when the elbow is extended as we make our way towards ball release.
There is some wiggle room here of course. Being 10 degrees in either way seems to be okay. Just ask this guy.
Shoulder Abduction – 90 degrees
Here’s another 90-degree angle. This time it’s the relationship between your torso and the upper arm (humerus). Here’s one of my childhood idols displaying it perfectly. Tom Henke was always on of my favorites; he wore glasses when he pitcher like me and he threw hard!!

This time, we are going to use this 90 degree angle to help maximize torque to load and unload our pecs a bit later on in the delivery.

Having the upper-arm is this position gives a pitcher the best chance at getting into these deep positions of horizontal abduction – which is next on our checklist.
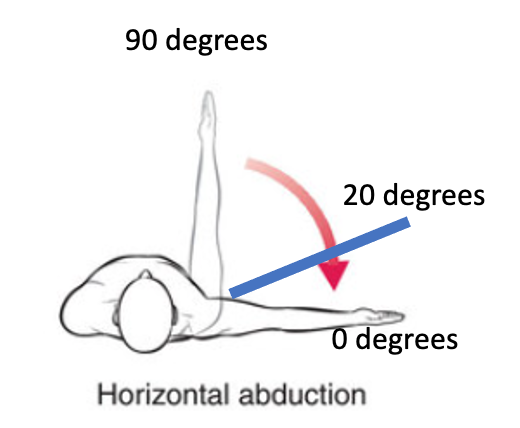
Horizontal Abduction – 20 degrees
Horizontal abduction refers to the scapular load, where the upper arm moves away from the body—like the motion of a pec deck machine. At maximum load, this angle can be negative, but at foot contact, it should only be around 20 degrees.
Too much load too early can reduce elastic energy in the muscles, similar to pausing too long before jumping.
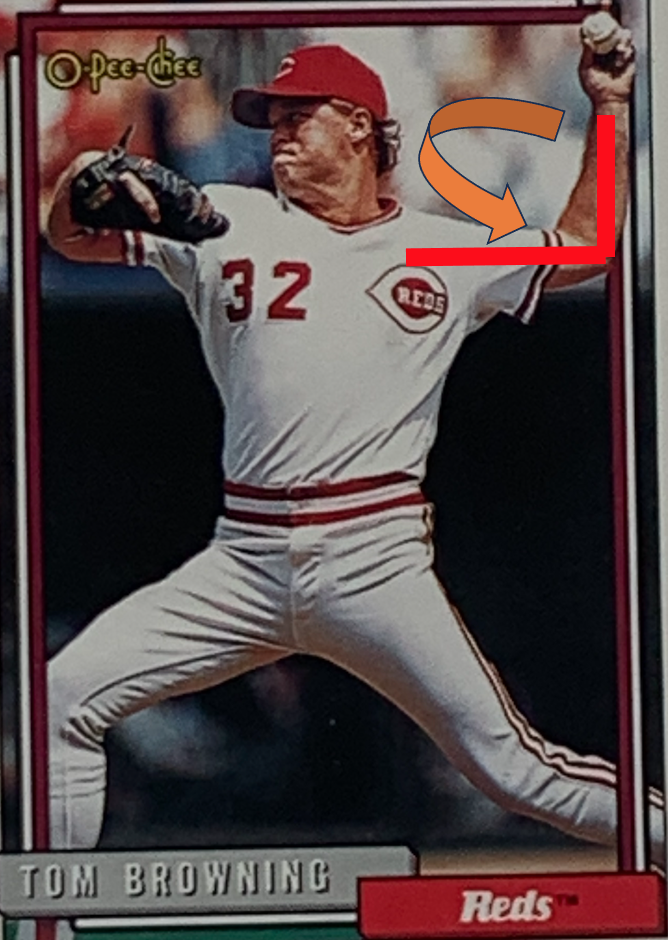
Keeping this angle to about 20 degrees at foot contact ensures the arm is prepared to stretch as the hips and torso rotate, enhancing energy transfer. Here’s an example of a pitcher who has too much horizonal abduction too early. Look closly at this baseball card I found from 1991. Mr Mahler’s foot isn’t even touching the ground yet but he’s loaded and ready to go.

Excessive horizontal abduction can also increase injury risk, particularly to the anterior glenohumeral capsular ligament. (Andrews et al. 1996.) Rick Mahler was a ten-year veteran at the time this picture was taken and assuming his mechanics were similar to what we see here he was still able to pitch a lot. The research just shows that you’re more at risk of injury. Its a never a guarantee either way.
Shoulder External Rotation – 45 degrees
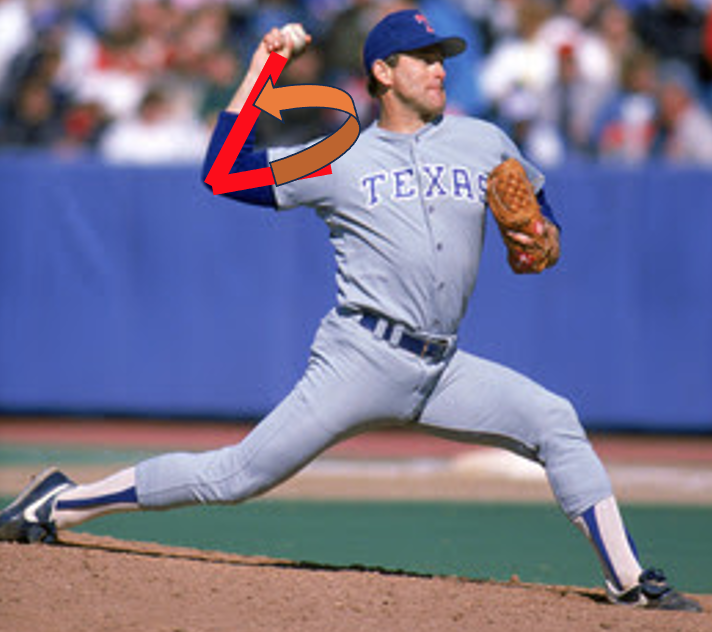
At foot contact, the shoulder should have about 45 degrees of external rotation. Here’s what that looks like.
Although the shoulder will eventually reach around 170 degrees at its maximum, getting there too soon can be problematic. Like we saw in Rick Mahler’s card. His forearm was vertical putting him at 90 degrees of external rotation.
Proper timing allows internal rotators to stretch optimally, generating power during contraction. Pitchers who reach this loaded position early may compromise mechanics, leading to inefficiencies by using their stretch shortening cycle too early.
Lead Foot Position – slightly closed
The lead foot should land slightly closed, meaning the foot is positioned slightly towards the midline of the body. A closed foot position, with a range of 4 to 14 inches from the centerline, helps manage pelvic rotation and energy transfer up the body.
Their definition of closed is based on a line that starts from the heel of the stance leg. You’d measure that distance that’s represented by the red line in this example of a right handed pitcher viewed from underneath.

Landing with an open foot can increase strain on the shoulder and elbow, potentially leading to injuries. (Whiteley RJ – 2007)
Stride Length – 85% of Height
A stride length of about 85% of the pitcher’s height is ideal. Striding too short might prevent proper arm positioning at foot contact, while striding too long can disrupt energy transfer if the pitcher lacks the mobility and strength to maintain proper mechanics. In the late 2000s, many young pitchers attempted longer strides (up to 120% of their height) to mimic elite pitchers like Cy Young winners, though this approach doesn’t always yield the desired results.

Upper Torso Position – 0 degrees
The torso should remain aligned, facing either first or third base (depending on the pitcher’s handedness) at foot contact. This would be considered 0 degrees while facing home plate require 90 degrees of rotation. Rotating too early towards home plate means releasing potential energy prematurely. Keeping the torso in line allows for better energy storage and more efficient release as the pitch progresses.

Here’s a good example of keeping the shoulders square (zero degrees) to first base as a lefty.
Pelvis Rotation – 30 degrees
At foot contact, the pelvis should only be slightly open—around 30 degrees, with the belt buckle pointing towards the far end of the dugout (part way between third base and home plate for a righty). This limited rotation, combined with a square upper body, starts to create the “hip and shoulder separation” that is key to generating velocity.
Here’s a great view of what this looks like from a modern day flame thrower.

So, here’s this checklist again.
- Elbow Flexion: 90°
- Shoulder Abduction: 90°
- Horizontal Abduction: 20°
- Shoulder External Rotation: 45°
- Lead Foot: Slightly closed position
- Stride Length: 85% of the pitcher’s height
- Upper Torso: In line, facing first or third base
- Pelvis Rotation: Slightly open (about 30°) toward home plate
This can be a simple yet effective tool that can help young pitchers see what they look like at this critical point of the delivery.
It does have its limitations. This is just one shape that a pitcher needs to make with their body when they throw a ball. How they move from one shape to the next along with how fast and smooth this transition occurs will really tell us how hard and safe an athlete is going to throw.
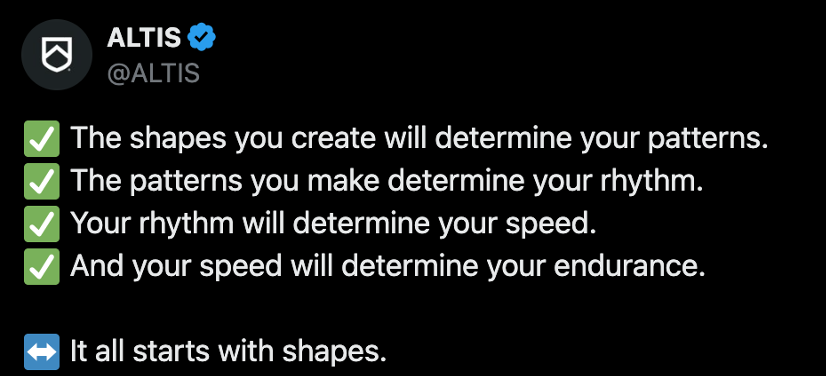
That being said, this particular shape is really important. Altis is a company that are leaders in the world of sprint training and here’s one of their sayings that I’m going to steal and apply to throwing. Check them out here if you want to learn from them.
In the next article in this series, I’ll focus by on the pattern of what we’d like to see happen between the time our front foot hits the ground and when we release the baseball. This was stressed the authors as another critical aspect of the delivery. Check it out in part 1.
Until then,
Graeme Lehman, MSc, CSCS


Leave a comment